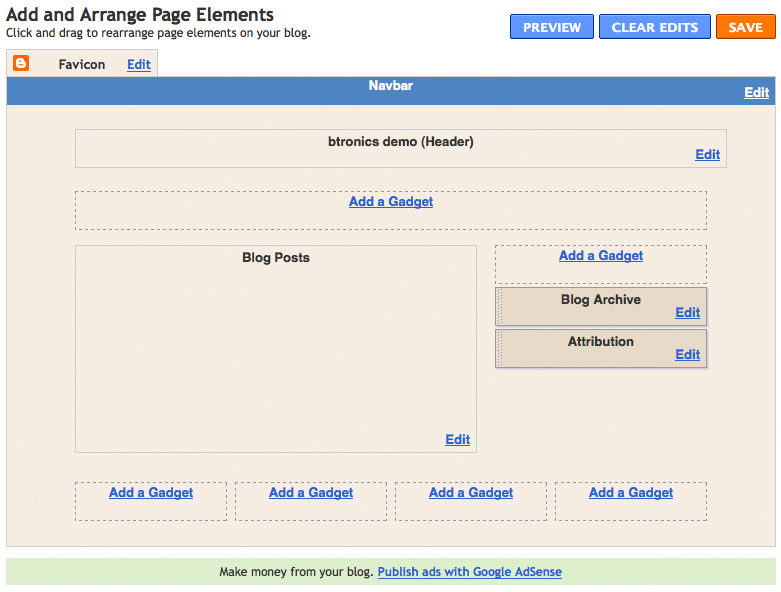
This tutorial involves converting your current template's footer into 3 or 4 columns. Converting your footer into columns allows extra room for more content and advertisement, and is a fairly easy tutorial.
| Demo Image |
 | |
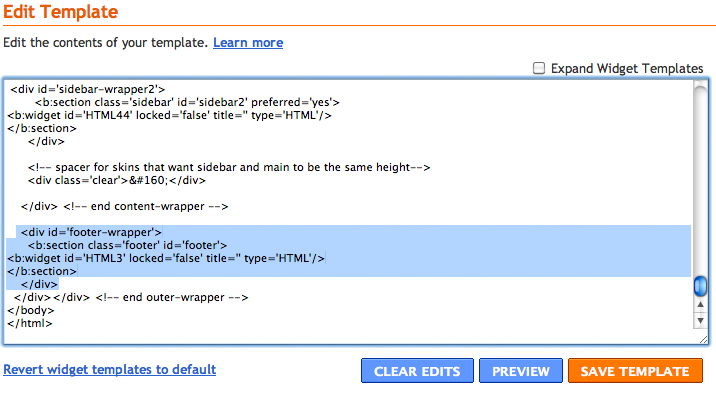
To add a 3 column footer to your blog, first find (Ctrl+F) the following section code in your template:
<div id='footer-wrapper'>
<b:section class='footer' id='footer'>
<b:widget id='HTML3' locked='false' title='' type='HTML'/>
</b:section>
</div>
| Example Image |
 | |
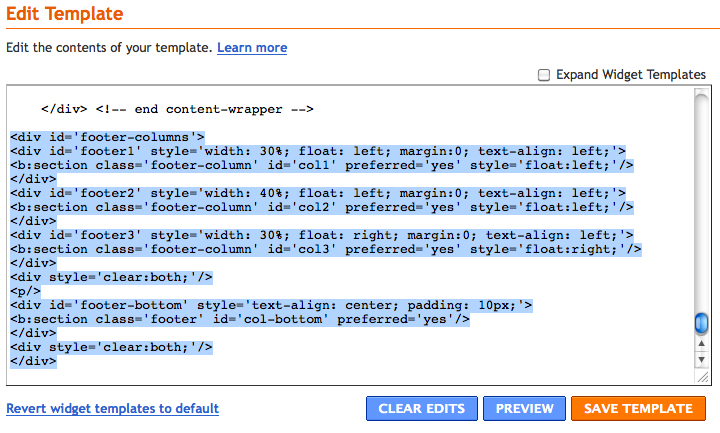
After you find your footer's section code, replace it with the following section code, and click "Preview" to see if you've implemented the code correctly. If your template loaded, you're good to click "Save Template".
<div id='footer-columns'>
<div id='footer1' style='width: 30%; float: left; margin:0; text-align: left;'>
<b:section class='footer-column' id='col1' preferred='yes' style='float:left;'/>
</div>
<div id='footer2' style='width: 40%; float: left; margin:0; text-align: left;'>
<b:section class='footer-column' id='col2' preferred='yes' style='float:left;'/>
</div>
<div id='footer3' style='width: 30%; float: right; margin:0; text-align: left;'>
<b:section class='footer-column' id='col3' preferred='yes' style='float:right;'/>
</div>
<div style='clear:both;'/>
<p/>
<div id='footer-bottom' style='text-align: center; padding: 10px;'>
<b:section class='footer' id='col-bottom' preferred='yes'/>
</div>
<div style='clear:both;'/>
</div>
| Example Image #2 |
 | |
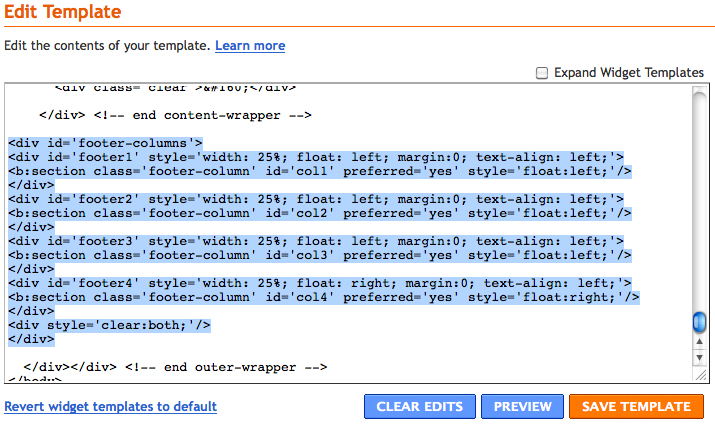
If you want to add a 4 column footer to your blog, then replace your footer's section code with the following section code instead of the one above. Always make sure you "Preview" your template after you make changes to it to be sure you've correctly implemented the tutorial. If it loads, then you're good to click "Save Template".
<div id='footer-columns'>
<div id='footer1' style='width: 25%; float: left; margin:0; text-align: left;'>
<b:section class='footer-column' id='col1' preferred='yes' style='float:left;'/>
</div>
<div id='footer2' style='width: 25%; float: left; margin:0; text-align: left;'>
<b:section class='footer-column' id='col2' preferred='yes' style='float:left;'/>
</div>
<div id='footer3' style='width: 25%; float: left; margin:0; text-align: left;'>
<b:section class='footer-column' id='col3' preferred='yes' style='float:left;'/>
</div>
<div id='footer4' style='width: 25%; float: right; margin:0; text-align: left;'>
<b:section class='footer-column' id='col4' preferred='yes' style='float:right;'/>
</div>
<div style='clear:both;'/>
</div>
| Example Image #3 |
 | |


